Kong meets Auth0

Here we are going to show you how to integrate Kong, an opensource API Gateway and Auth0, a good auth as a service solution. Both make a very good solution for decoupling the filtering and authentication from your application on an easy way.
Here is a diagram showing you what we are going to do in this post:
Setup Auth0
If you don't have an account already, go to Auth0 and create one.
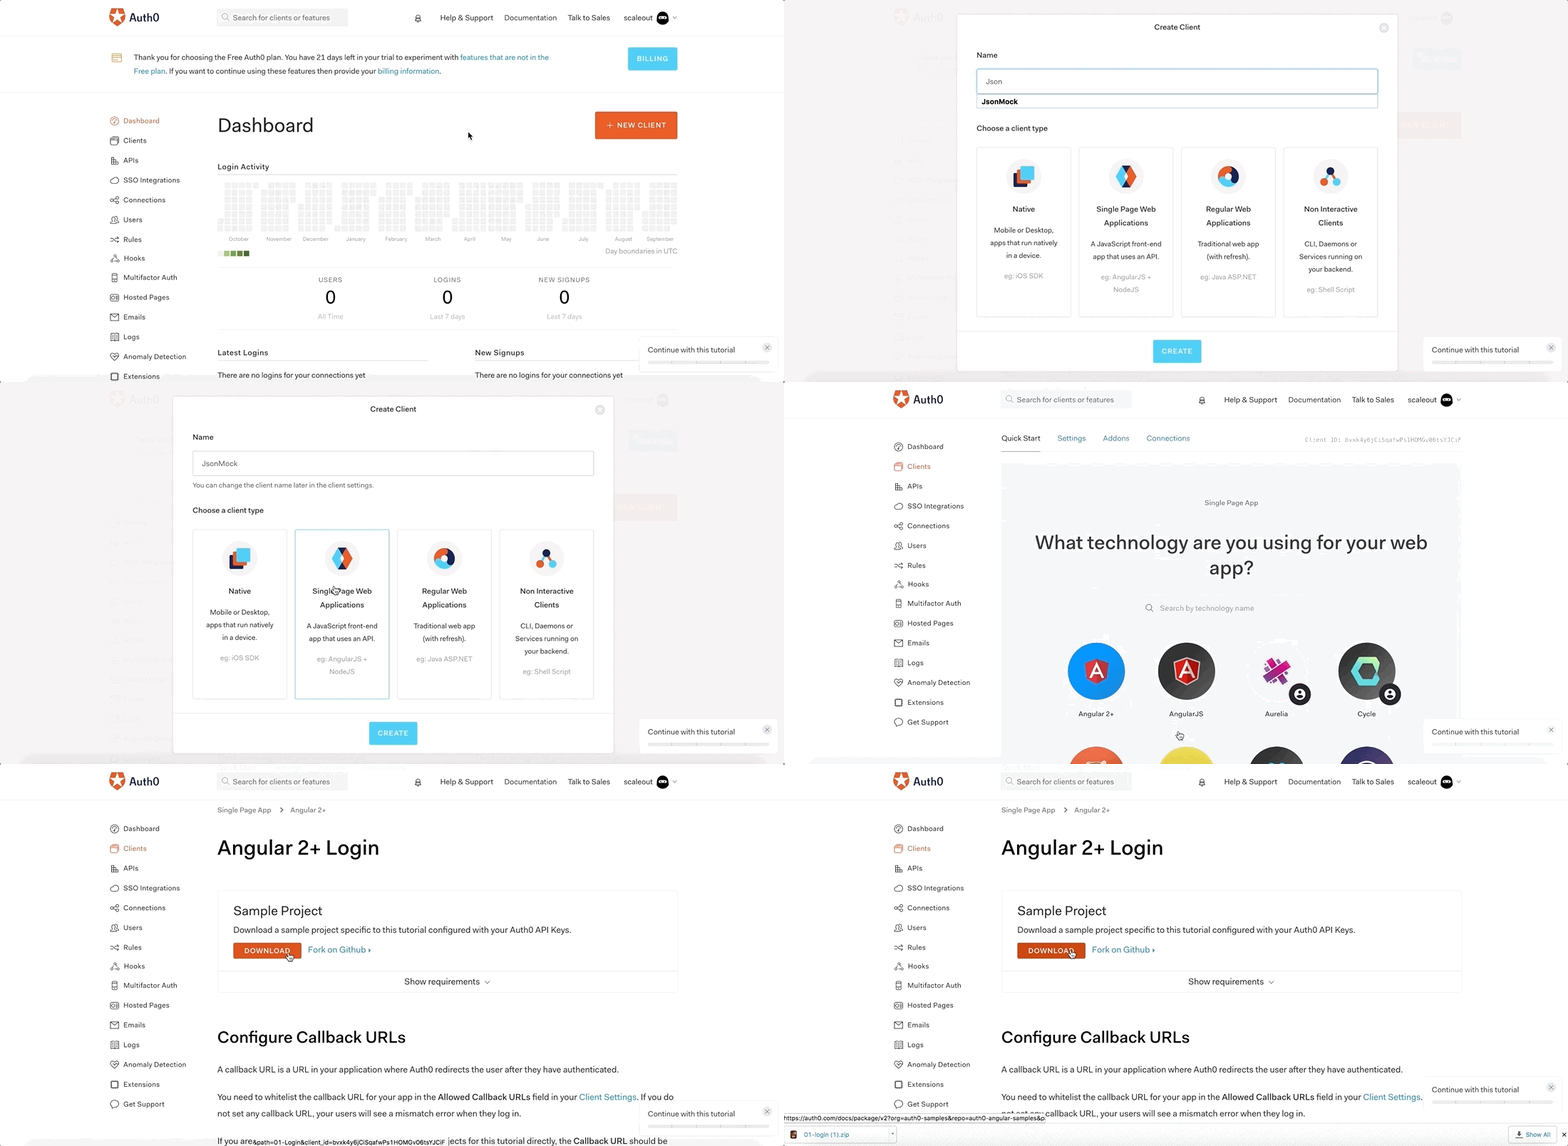
Then in that account we are going to create a client that we will use to authenticate, let's call it JsonMock
Download the sample app of that client using: Single Page Application > Angular 2+

To be able to use this sample client in localhost we would need to add localhost to our client, head to Clients > Settings > Allowed Callback URLs and add: http://localhost:3000/callback
Now let's add extra login into the Angular 2 app so we can get the Token on an easy way.
Extract the sample app, go to the file src/app/auth/auth.service.ts and add extra login into the method setSession
function localLogin(authResult) {
    ...
    console.log("Logged in!!");
    console.dir(authResult);
}
Then we can start the sample app:
npm install && npm start
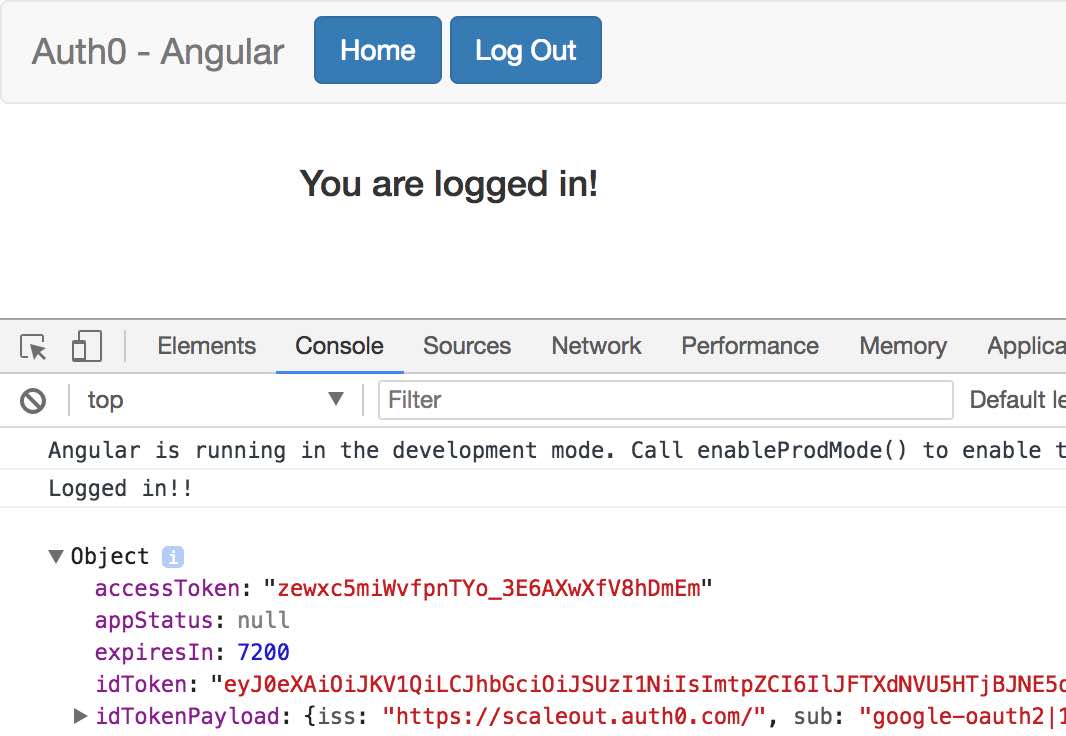
Open the developer console in your browser and login with your credentials, we should be able to see the token:

The important info from this logs are the idToken which is our auth token and the iss which we will need to add later in Kong. If we take this token and test it in https://jwt.io/ we should get all the info that this token has.
Setup Kong
Now that we have our Auth0 setup done, we can startup an instance of Kong and add the necessary credentials to understand that JWT.
Start a Kong instance and create a new API in Kong, here we are going to use jsonplaceholder:
## Add the service
curl -i -X POST \
  --url http://localhost:8001/services/ \
  --data 'name=jsonmock-api' \
  --data 'url=https://jsonplaceholder.typicode.com/users'

## Add the route
curl -i -X POST \
  --url http://localhost:8001/services/jsonmock-api/routes \
  --data 'paths[]=/users'
Verify that it works:
curl -i -X GET \
  --url http://localhost:8000/users/1
Up to here we have a running an non protected api, our goal is to protect it with a JWT interceptor, we would need to download the certificate from Auth0 and then create the JWT plugin for our API.
Let's first add the jwt plugin to our API:
curl -i -X POST \
  --url http://localhost:8001/services/jsonmock-api/plugins/ \
  --data 'name=jwt'
Now create a consumer which is going to have the credentials:
curl -i -X POST \
  --url http://localhost:8001/consumers/ \
  --data "username=user123"
Integrate Kong with Auth0
Now that we have an API and a consumer, we can start integrating Auth0:
Download your X509 Certificate from your Auth0 account:
COMPANYNAME=YourAuth0UserHere
curl -o ${COMPANYNAME}.pem "https://${COMPANYNAME}.eu.auth0.com/pem"
Note: You can get this URL from the Auth0 Management API in the APIs section
Extract the public key from the X509 Certificate:
openssl x509 -pubkey -noout -in ${COMPANYNAME}.pem > pubkey.pem
curl -i -X POST http://localhost:8001/consumers/user123/jwt \
    -F "algorithm=RS256" \
    -F "rsa_public_key=@./pubkey.pem" \
    -F "key=https://${COMPANYNAME}.eu.auth0.com/"
Here we are specifying:
- algorithm: this one is the same as configured in Auth0 under the advanced settings
- key: this one is the iss value in the payload of the token. You can check it out from the Angular2 app
- rsa_public_key: public key from the X509 certificate we extracted before
If we now try to access our API we would get a 401, since we now need a token to access it.
curl -i -X GET \
  --url http://localhost:8000/users/1
HTTP/1.1 401 Unauthorized
...
We can now get the token from the Auth0 Angular App, and paste it in an authorization header like so:
curl -i -X GET \
  -H "Authorization: Bearer $TOKEN" \
  --url http://localhost:8000/users/1
HTTP/1.1 200 OK
...
Now we should be able to get back the protected resource.
Now we fully have Auth0 integrated with our Kong gateway, adding all the security our APIs may need without the hassle of developing those auth layers. Hope this post was useful for you and you've got a good understanding on how to combine these 2 solutions, if you have anything to add please leave a comment below.
